Friday, June 24, 2011

CONGRATS banner!

Hi all, well it has been super busy here.  My kiddos are finally done with school and my son graduated 'moved up' to the middle school for 5th grade....seriously I can't believe I have a 5th grader!!!
We had a family graduation party for him and my parents and my DH and I bought him a blow up water slide...so fun!  My DD got an end of the school year gift, too, we couldn't leave her out, she  finally got a snow cone maker and it works like a dream!!!

So here is the banner that I made my son

I used my Gypsy and cricut E2.  I used Cricut Alphabet for the 'you did it' with shadow and the letters on the banner.  I used  Locker Talk for the award shaped and Everyday Pop Up Cards for the graduation caps.
I ruffled some white crepe paper around the circle and glittered the edges in black glitter.  I used primary colors for him as it was an elementary school graduation. 

Here is my handsome little 4th grader.....

Not the best pic of my son....but we interupted his fun on the water slide so that we could have cake!!! Lol!
We are so proud of the kids and stunned that the school year is over already!  Now, we look foward to a wonderful  and playful summer!!
Thanks for looking and have a great day!
~Jeannine


Sunday, June 19, 2011

Happy Father's Day!

Happy Dad's day to all the Daddy's out there!!

I just wanted to jump on real quick before we go out to play on our new water slide and share this adorable project that the kids and I made for their Daddy!
A while ago my good friend Liz sent my kids this Dad clock from Kaiser Craft (thanks Liz) and I thought it would be perfect for the kids to alter for their Daddy!  We used the new Imaginisce line Happy Camper and we think it is adorable!   Daddy hasn't opened any of his gifts yet because he is working, but we are sure he will just love it!
 Here is a peek at the matching gift bag that we made using a kraft bag and Camping Critters papers and just added some green curling ribbon!
Supplies used:
naked DAD clock:  Kaiser Craft
Papers:  Imaginisce; Happy Camper collection:  Gone Fishing, Fireside Fun, Thermal Jammies, Don't Feed The Bears
Stickers:  Imaginisce Happy Camper canvas stickers, Imaginisce Roughing It stickers
Die Cuts:  Imaginisce camp critter
Other:  ink, twine

I have to say that the Imaginisce Happy Camper collection is absolutely adorable....I have made numerous projects with it already and I love the patterns...not to mention the names of the papers!!!  I also love the naked clock, decorating it was super easy and the kids had fun inking the cuts and adding stickers...thanks so much Liz!  I will be looking for more of these in the future...super quick and easy!

I hope you all have a great day with your families!!!
~Jeannine


Monday, June 13, 2011

Thank You Imaginisce!!!!

Last month I won a set of the new Roly Rosie/ Posie flowers from the Imaginisce blog!  I was super excited to receive them, but not only did I get all the new flowers I also got a bunch of other flower packages!!!  So, thank you Imaginisce!!!!!    The first thing I did with the new Roly Rosies is make my DD a headband! Here is the big box of goodies that Imaginisce sent me:

I found the zebra stripe headband at Target for $1 and added some pink and text fabric flowers!  These are so much fun to make!  I added a little white bow and used my i rock to add some bling!
I had a ton of fun making these flowers and I can't wait to make some more!
Well, it doesn't end there......................................
I recently won the new Happy Camper line from Imaginisce on the Cricut Circle blog!  I was thrilled because my DH is taking my son camping this summer and we do a bunch of outdoor activities in the summer!  This is just such a cute line, love the papers...some are embossed and glossy....love the cute stamps and all of the diecuts and stickers!
 Here is the whole Happy Camper set that Imaginisce kindly sent me:

Here is the Father's Day card that I made for my Dad with the set:  I used a sketch from Sassy Lil' Card Sketches!


Supplies used for card:
Imaginisce Happy Camper
  • Fresh Air - reverse side
  • Tree Hugger - wood circles
  • Fireside Fun - strip of canoes
  • Roughing it Sticker Stackers (gone fishing)
twine
Amazing Dad stamp by Studio g

Thank you Imaginisce for not only sending me such wonderful goodies, but for making such fun prodects and having a blog with an amazing Design Team that constantly creates amazing projects!!!
Ok I am off to make some more fun projects with my new goodies!
Have a great day!
~Jeannine

Friday, June 10, 2011

Thinking of you!

Good afternoon!   It is a very hot day here today and it has been hectic....my kids needed new shorts again...I just bought some last month...talk about a growth spurt!!!!  My DH took me shopping, we had lunch, got a call from the school nurse that son had an ear infection....went to Dr. and no ear infection.  Then we went strawberry picking, picked up cookies for son's school dance tonight, got son's haircut and I am getting ready to go to M's to teach a glitter class tonight!!!

So, with all that said....I want to share a card that I made...originally it was for a sketch challenge, but with being so busy I never made the deadline.  Oh well, maybe next time!
Here is the card:

I had so much fun putting this card together....after the card base was cut I added glitter using a fine tip glue to the edge and MS glitter.  I couldn't find any ribbon to match to make the bow, so I made a paper bow.  I think it came out so cute and is a great touch to the card. The sentiment is a bit hard to see because the paper is light, but it says 'thinking of you'.

Paper:  KandCo. Hopscotch
glitter: Martha Stewart
Cricut cartridges:  Birthday Bash (card base)  and Lacy Labels ( oval and sentiment)
Gypsy:  resized images

Thanks for stopping by my blog, I promise to have some more projects coming soon.  My son is graduating (moving up from 4th grade) and I made a banner and some goodies for the party that I will post soon!
Have a wonderful day and stay cool!!
~Jeannine

Friday, May 27, 2011

Memorial Day!

Happy Memorial Day weekend!  My kids are off today and Monday so we have a few days of fun!  We will be going to the beach...weather permitting!!! Fingers crossed!
Here is a quick card that I made for the family!
I used Just Because Cards cartridge for the scalloped card base and welded two together to make the base and the front of the card.  I used Independance Day cartridge for the circle with the cut out stars and stripes and placed some blue paper behind it to pop the colors!   I also used Independance Day to cut the title Memorial Day!  I added some twine and a charm that I have had in my stash from the $1 bin at Target!  I kept it super simple and kind of rustic looking!

I hope you all have a wonderful Memorial Day weekend!
Edited to add:  I entered this card in a Memorial Day contest on this blog

Tuesday, May 24, 2011

Cute Country Girl!!

I have finally made another layout....it has been too long...lol!! I have been making cards alot lately, so it was nice to do a layout. This was made for the cricut circle blog challenge...we followed a sketch and this is what I came up with!
I have had the pictures and the title laying on my desk for a while and when I saw the sketch, I knew it was time to scrap them!  The scallop background was cut from the Elegant Edges cartridge which I absolutely love!!  I made the denim flower on the layout with a strip of my DH's jeans....I frayed the edges by pulling the threads out and then gathered the inner side with thread to form the flower. The brad is an i top using the same background paper. You will notice the hair clips in my DD's hair...the same denim flower!  
The title was cut from Country Life cartridge and the boots I made myself....before I owned the Old West Cartridge, but I thought they turned out so cute that I chose to use them.  I used Paisley and cut the rain boots and then welded a rectangle to the top to form the boot loop. I embossed them and inked them!
The butterfly border was cut using the Elegant Edges and I welded two borders together and stretched them on my Gypsy....I used pop dots to raise the top layer from the bottom layer. 
I think that about does it.....oh, I also added some stitching to the layout around the border just for more texture!
Ok, well, I am off to make some dinner....have a great night!!
~Jeannine

Wednesday, May 18, 2011

Launch of the new Cricut Blog!!!!

Cricut: The Official Blog


If you love the cricut world as much as I do then you will be thrilled to know that they just launched a new blog. Make sure you go check it out HERE to become a follower and leave a comment for your chance to win an awesome prize..... $100 store credit to cricut.com!!! I am so excited for this blog as I know it will be a great source of inspiration and the latest news!

The Official Cricut Blog sponsored by the Cricut Circle will feature the following:


- Inspirational projects using your favorite Cricut machines. The Imagine, Expression, Cricut Cake, Cuttlebug, Yudu and more
- Hello Thursday Cartridge announcements.
- Educational videos and tutorials directly from Provo Craft.
- Occasional sneak peeks into the exclusive Cricut Circle Community.
- Access to the latest Cricut.com deals.- And much, much more!

Friday, May 13, 2011

Sparkly Birdie Card!

Good Afternoon!
Well, my post got a little mixed up while blogger was down, so I am starting from scratch!!
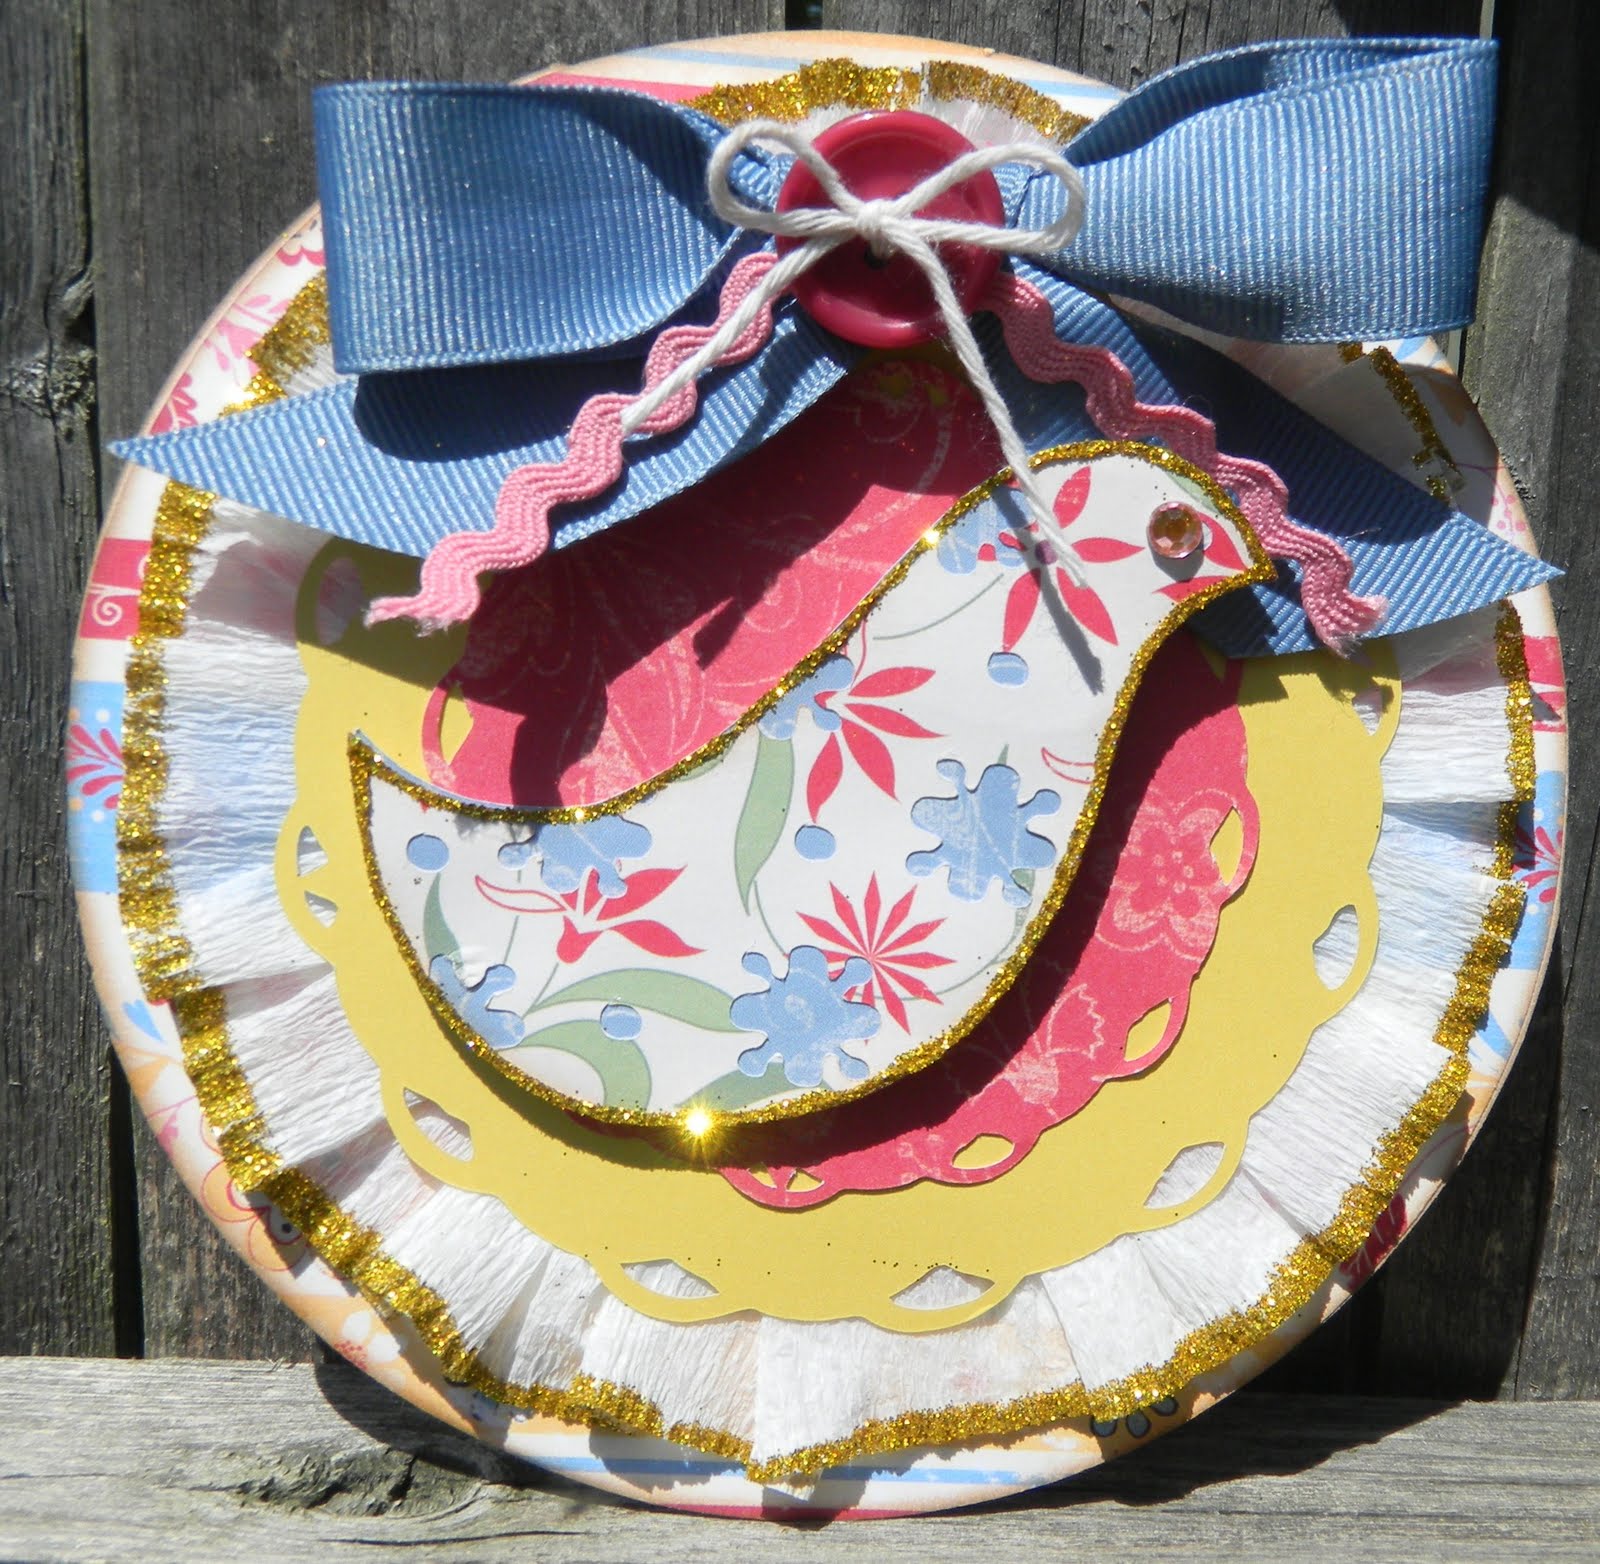
Here is a pretty card that I made for the cricut circle blog challenge. We had to play tic tac toe and get three in a row! The three in a row that I chose are...use ric rac (check), use a ruffle (check) and use a cut of a bird (check)! I also added a few more tic tac toe boxes as well....I used the Gypsy and welded an image ( the circle card) and I also used a button on my card!

I absolutely love how this card turned out and I had fun playing with MS glitters again! I just love her glitter and glues!
Supplies:
Gypsy: welded circle
Cricut expression 2 (E2)
Just A Note Cartridge: bird image cut at 2.5" and flipped
Lacy Labels Cartridge: fancy circles
Plantin Schoolbook cartridge: circles welded to form card
crepe paper for ruffle border
Martha Stewart glitter and glue
foam dots
ribbon
ric rac
button
twine
*honestly, I am not sure what paper line I used, sorry* It is from my scraps

Wednesday, May 11, 2011

School Posters!

Good morning!
I wanted to share these posters that I made for my sons school! I almost forgot to take pictures of it and snapped these quick before we jumped in the car to go to school!!
We are doing a 4th grade moving up ceremony in June and we have been doing fundraisers to help earn money for the big party day! We did a plant sale for Mother's Day that went really well and now we are doing raffle baskets, kind of like a chinese auction. We had parents donate items and we put together baskets! So, I made these signs to hang in the school and I love how they turned out!
I used the Cricut American Alphabet between 1.75 and 2.5 inches for the letters and used alternating pattern paper and colorful cardstock. I added some tickets with the information as well.
I sure hope these colorful posters will be a help to our fundraiser!

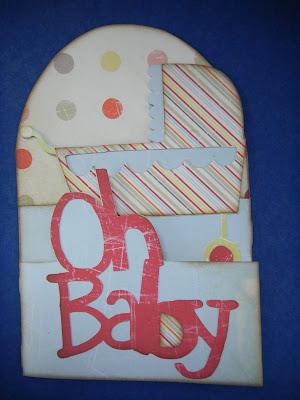
Oh Baby!!


Good morning everyone!!!

I had such a lazy day yesterday and really didn't get much done. All of the running around really caught up to me!

So, I made this quick card using the Just A Note cartridge that is built into the new E2....I love the tri fold cards on that cartridge!
I used the fit to page and cosmo cricket papers!


These cards are just super quick and easy! I think this card turned out cute! Thanks for looking and enjoy your day!!

~Jeannine


Monday, May 9, 2011

With Sympathy Card!

Good evening!
Yet another post today from me!!! I found out today that my Uncle lost his father yesterday so I made up this card to send to him and his family! I used the Cricut American Alphabet cartridge that came built into the E2 and cut this beautiful tree. It is cut at 4" using the shift key and then again in brown using the blackout key. I added pop dots to add dimension. The tag is from Cricut Essentials and cut at 1.5 inches (I think) lol and tied to the tree with twine. I hand wrote the sentiment....oh the papers are all Cosmo Cricket! I also cut a brown tree a bit smaller to use on the envelope!

I am going to enter this card into the My Pink Stamper NSD challenges....that is only two challenges done for me, but that is better than none!!!!!


Have a great night and good luck if you were able to enter some of Robyn's challenges!!!

My Scrap Space!

Well, a portion of it anyway. My scrap space is downstairs and it is not finished, but I have lots of space and storage! I have been crafting at the kitchen table lately only because the kids have so much going on so I feel like if I can just get a little something done in between doing a million other things than I am good!


So, I took this pic late last night and I was so tired, but I wanted to enter the pic into the contest on the cricut circle blog, so I dragged my DH down to snap it!


Behind me is my shelf with my cartridges! I still have some cleaning up to do and more organizing, but it is good for now, it functions!

A Happy Mother's Day!!!

A belated Happy Mother's Day to all the women out there!! I hope you all had a fabulous day!

I was super busy with the family yesterday, so I didn't get a chance to post! The kids gave me all of their beautiful projects that they made in school and it just melted my heart, they also got me a MD balloon (I think my DD wanted it for her...lol)! I took the kids to Church while DH was at work and it was a beautiful Mass...some kids were making there First Holy Communion and my DD was so excited to see all the girls, she will be making hers next year! Then we went to the beach and a BBQ!


Here is the flower pot card that I made for my mother, she is a pinky tropical girl so those are the colors that I chose! You can find the directions HERE for the adorable flower pot! I cut the flowers from Paisley and used the directions from Capadia Designs blog. I am not quite sure what sizes I cut them, but I think the largest is 2" and the smallest was 3/4 ". They make a cute dimensional flower! I added some jewels to jazz it up or as my DD would say, "to add some PPIIIIZZZAAAAZZZZZZ!!!" I tied it up with a tulle bow and stamped the sentiment inside using a pink ink pad! I am entering this card into Robyn's National Scrapbook Day challenge....we have until midnight tonight to enter, go check it out HERE!!!!


Here are some pictures of the kids at the beach...when we got there it was super sunny and hot, then the couds hid the sun and it got chilly!!!


This is a picture of my kids with my two nieces in the middle, they had so much fun playing together!!!


Saturday, May 7, 2011

Happy National Scrapbook Day!!!

Hello friends!
Today is National Scrapbook Day! There are fun challenges going on all over the internet! I hope some of you all got to play along a bit!
I had a super busy day with the kids and family....we were going and going and going for over 12 hours! We got home exhausted and just wanted to jump on to wish you all a happy NSD! I wish I had time to participate today! If you still want to do some NSD challenges and a chance to win some fun prizes then go check out one of my favorite sites.........My Pink Stamper, Robyn has some great stuff going on and the challenges are open until Monday night....so there is still time to play along! I hope to maybe get my NSD done on Monday when the kiddos are in school! I need to play with my E2 and get some challenges done!
Well, I hope you all had a great day today and a Happy Mother's Day tomorrow!!!!!!!!!!!!!!

Friday, May 6, 2011

Gift Card Holders!

Good morning! Yay it's finally Friday!!!
I have made a few gift card holders for the weekly cricut circle challenge that I would like to share!
I decided to get a jump start on my end of the year teachers gifts, so I made these! The holder was cut in kraft cardstock on the gypsy using the Cindy Loo cartridge. The gingham pp was printed using the Imagine and Imagine More Cards cartridge. The apples were cut using Doodlecharms cartridge and cutting it twice, inked the edges in brown ink and used faom dimensionals. The small apple was made using the gypsy...same apple only smaller and I used the hide contour feature to hide the cut outs. The leaves are from the Give A Hoot cartridge and I added some twine! The stamp is a snag 'em stamp from Imaginisce! These came together so fast and easy!


The second gift card holder I made is for my son....he is having a moving up ceremony (aka graduation) so I will add a gift card to a game store! I cut the gift card using blue cardstock. The graduation cap is from the Everyday Pop Up Cards cartridge and the diploma was cut using the A Childs Year cartridge! The sentiment is computer generated and scored to add dimension to the GRAD!

I hope you all have a wonderful weekend! I will hopefully have a Mother's Day card to share with you all tomorrow!

Tuesday, May 3, 2011

A few quickies with me new Cricut Expression II

Hi there! It is a bit late here, but wanted to share these quick cards that I made today using my new Cricut 5th Anniversary Edition Expression II !!
I LOVE the new E2 so far, but only got to explore for a bit...my favorite thing about it is the 4 cartridges that are built right into the machine!
This card is from the Just A Note cartridge and is a tri fold card....I used fit to page and it cut it out perfectly...about an A2 size I guess and it has the card layers also!


These 2 cards were made using the Cricut Decals and OMGosh it is SOOOOOOO adorable!

I cut this little baseball girl at 3.75" in white and used a pink shadow...to cute with her pony tails!!


And here is the little baseball boy with the spiky hair just like my sons!!! I made them each a quick little card to wish them luck this week with their games!!! I plan on making them with vinyl for my car this week!!!


So there you have 3 quickies using the built in cartridges of the new E2!!! I had so much fun playing with it today and hope to find a bit more time to navigate through the machine again!!!

Have a wonderful night!

~Jeannine