Thursday, April 7, 2011

Let's Play Ball!

Good morning! Here is a layout that I finished up yesterday for the cricut circle weekly challenge! We had to create a sketch and make a layout with it! I knew I wanted to use these adorable pics of my son from his first time playing t ball in pre k (he is now in Minor League and in 4th grade) so I started with that and then made my sketch....the good old fashion way...pencil and a ruler!! Lol! Here is my sketch............ Here is my layout.......... I couldn't find any nice pp to go with this layout, so I just stuck to some plain old cardstock! I used Sprots Mania for the baseball and the title and the grass is from MS seasonal cake cartridge. I think it came out cute, but the pic is terrible..it is yet another dark rainy day here! Sports Mania: baseball 71/4 " with shadow feature, title is stretched on gypsy MS seasonal cake: grass (stretched out on Gypsy) So there you have it! I have to go to school and volunteer to sew again today and then I HAVE to get my housework done....I have neglected it all week so that I could play. My kiddos have off tomorrow for parent/ teacher conferences, so tonight is like our Friday night. We are watching our little 2 year old niece tomorrow, so the house has to be all cleaned up so that I can just play with her. That's all for now, have a wonderful day!!!

Tuesday, April 5, 2011

Rain Rain Go Away.....

It is an aweful rainy, dark, windy and chilly day here in New York! I received a package from Fed Ex this afternoon with all of my cricut plushies and new cartridges.....so instead of doing housework, I got to play! I mean I really had to play, I couldn't just look at them! So, with the April Showers cartridge I created this card...............

Paper: Sei Chick-a-dee collection "tiny bubbles"


umbrella: 3"
rain boots: 2"
cloud (for puddle): 2.5"
squirrel: 2.25 "
worm: 1.75 "
sentiment: 1.75"
other: foam dots, brown ink, glossy accents, white gel pen
I added glossy accents to some of the dots on the paper to look like rain and around the cloud that I used for the puddle to add some shine for a water effect! I also added some white dots just for fun!! I love how quick this card was for me....a half hour from start to finish!


I think I will enter this into the FCCB challenge this week....the challenge is to use an umbrella, so I think this fits the bill!


In the box were also our cricut friends....I got a big one for me and two little fellows for my kiddos. Here is my daughter holding all three cricut friends....she already had a barrette in her cricut's hair and I overheard her talking to it...too cute!!!! That's all for tonight! Have a good one! ~Jeannine

Up Up and Away!

Good morning! Here is a card that I made yesterday using the Everyday Pop Up Cards cricut cartridge! I couldn't post it yesterday because my son had his first baseball practice and we had to get homework done. So.......here is the card! I made this for my SIL and BIL's anniversary.....they got engaged in a hot air balloon, so that always seems to be their anniversary theme! I thought that the card came together great...however, sizing could be a challenge. I cut the card that was on the same page as the hot air balloon at 7 inches ( the finished card measures 5.5 x 7 inches). The balloon on the front of the card was cut at 4 inches and the actual pop up balloon inside was cut at 7 inches. The clouds were cut from the same page at 5.5 and 6 inches only using the first cloud. The paper is from My Minds Eye Love Me Do collection. I inked all the edges in brown and added pop dots to the balloon on the front of the card. I also used a MS punch for the strip on the front and the inside of the card, the sentiment is a rub on!
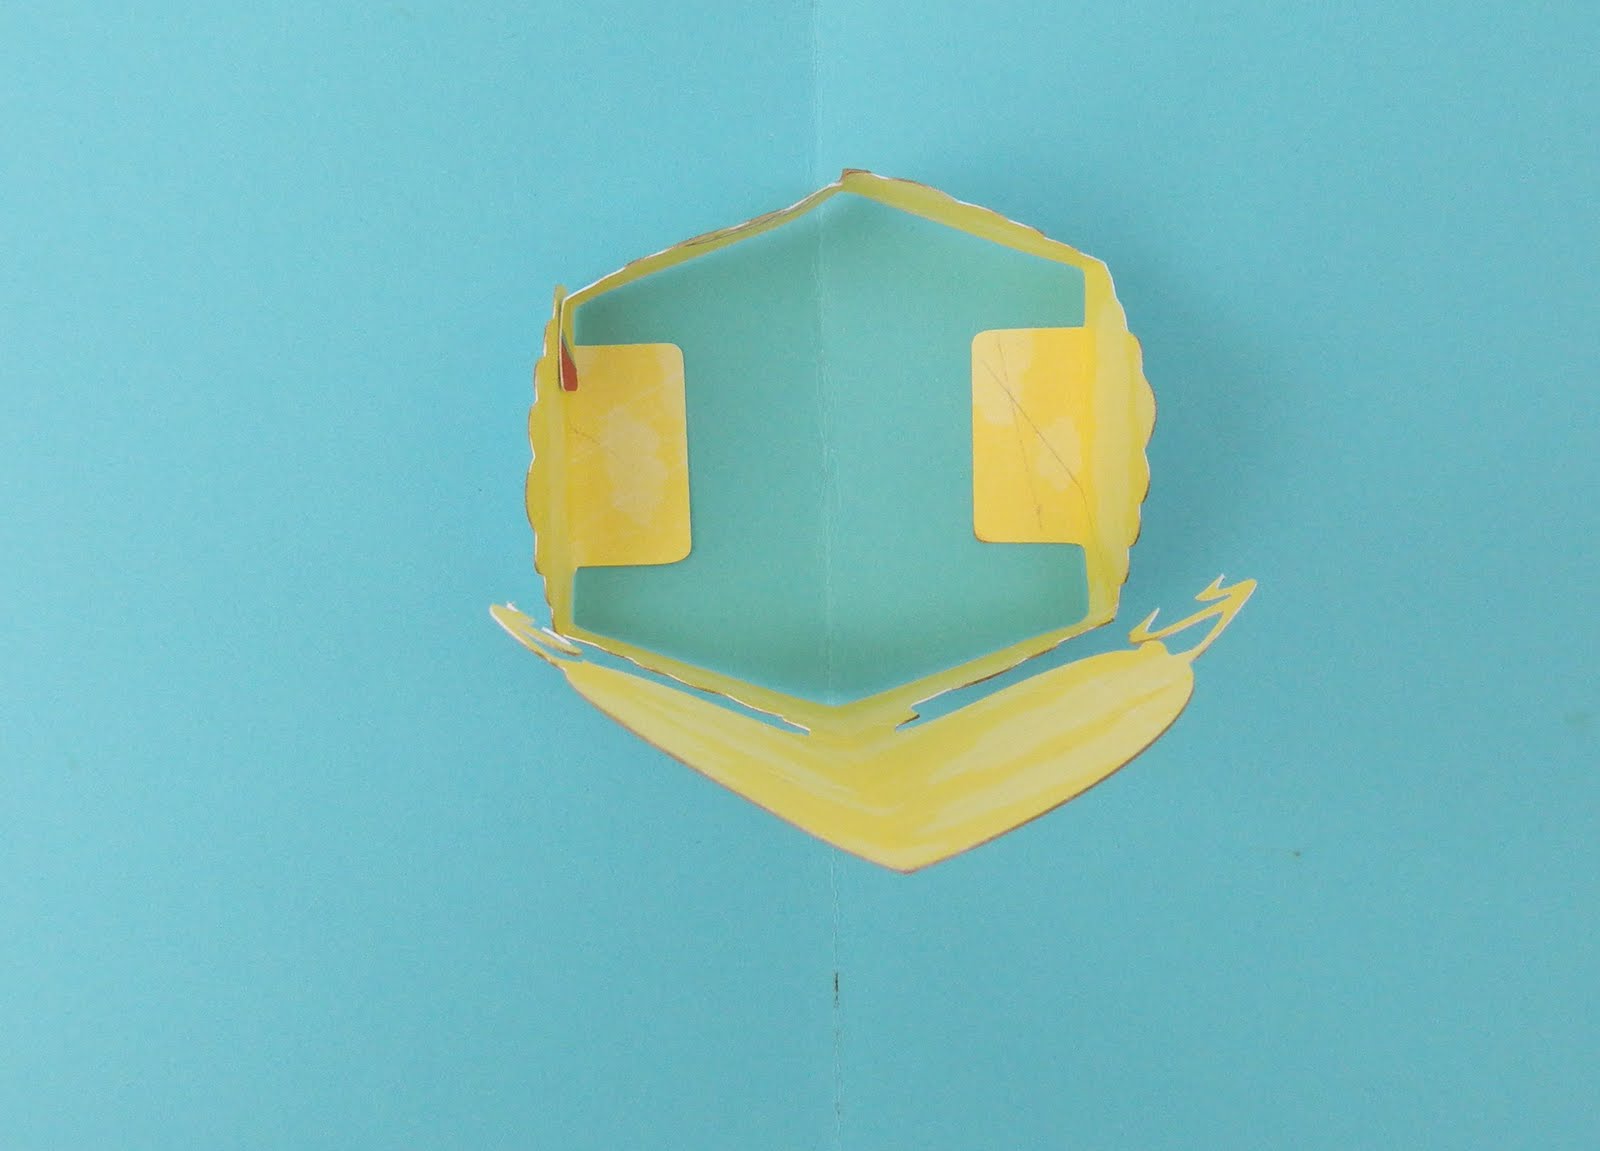
There are tiny marks on the cuts to tell you where to fold and on the image in the handbook there are markings to tell you where to fold to make sure that the image will fold flat when the card is closed.
Here is a birds eye view to see where I placed the tabs on the inside and you can see where it is scored to make sure that it lays flat when closed.
I hope that they like this card as much as I enjoyed making it. My DH and I are going to watch our niece so that they can go to a nice lunch together while their big kids are in school. I am going to put some cash in the card to help with lunch. I can't wait to spend the day with my niece on Friday!!

I hope to make a short video soon on how to assemble these cards, so be on the look out!! If you didn't see my cute little bunny purses yet, scroll down and take a peek, they are adorable!

Monday, April 4, 2011

Adorable Bunny Purses!!!

Good morning and Happy Monday! I can't believe it is the beginning of another week. This weekend flew by. I had my Mother and my niece sleepover, we had an ice cream party, a family BBQ and I had to work yesterday! I am glad to be home to start some new projects!


I have to share these adorable bunny pocketbooks with you all....I couldn't imagine them turning out any cuter! I think they are adorable....if I do say so myself!!

I found the directions for this purse here. I used the knifty knitter and followed the directions. It was very simple and only took me a few hours to make one and a few minutes to dress it up!

I made four purses so far for Easter...I will fill them with yummy treats. I made one for my 7 year old daughter, my 6 year old niece and my two nieces that are 2 years old!!


This is the first one that I made for my 2 year old niece...I followed the directions, however, I made the strap much smaller so that it is easy for little ones to hold! I kept this one simple and used hot glue for the eyes and the pom-poms.
This is the one that I made for my 6 year old niece....well, it started out to be for my daughter, but she didn't want the fur...I was a bit disappointed because I love it so much! I made this one with fun fur according to the directions and I added some pipe cleaner whiskers and some hair (or ear) bows and a little pink stickles for the pink cheeks!This is my daughter's purse....she wanted a longer strap so that she could wear it as a saddle bag! She did not want the fur and she picked the google eyes with the pink eyelashes, so I added some hot pink tulle to the bow!I think they all turned out adorable and I can't wait to fill them for Easter....my daughter is using hers now for the Easter Season!!!
I hope you all have a fabulous week!

Thursday, March 31, 2011

A home filled with LOVE!!!

Hello friends! I know this is a late post, but I just finished it up! I have been working on this for days and then today when I was going to finish it up, I found out that I was a victim of identity theft....someone used my d/c at a walmart in SC and my account was frozen. To say that I am upset is an understatement! So, I finally finished it up and here it is................

I made this for the cricut circle weekly challenge...we had to create a layout about an everyday topic. I chose to focus on my kids and their pets (no Sammi is not choking the cat...she just wanted him to look at the camera...lol).


Everything was designed on my gypsy.... the house was cut using My Community cartridge, the letters w/ shadow using Birthday Bash cartridge, the hearts using Plantin Schoolbook and the grass using Sports Mania! I used Echo Park 'Life is Good' paper line and some of the letters and flowers. I stitched around the layout and the photo mat with pink and the house in white.


I had fun putting it all together and it felt good to do another layout....lately I have been making cards, so this was great to get back into the groove. I, also, love a good challenge!!

Monday, March 28, 2011

Pucker Up!

Good afternoon!

Just poppin' in to share this quick card that I made! When I saw this lemon face on the Simply Charmed cricut cartridge I knew that I had to use it with the new Berrylicious papers from Imaginisce.

I added some diamond glaze and glitter to the lemon to sweeten it up and I pleated a strip of paper just to add some dimension!


Have a wonderful Monday!!


Supplies used:
Simply Charmed cricut cartridge: lemon cut at 3"
Paper: Imaginisce; cherry lemonade (berrylicious) and come one!come all! (animal crackers) I also used the green cardstock packaging from the pack of stickers.
Miscellanious: diamond glaze, MS chunky glitter, pop dots, atg, pre cut card, fiskars border punch, Imaginisce berrylicious die cut and canvas sticker.

Saturday, March 26, 2011

Celebrate with Birthday Bash!

Hi there! Today was a chilly Saturday here, but we had fun riding bikes outside and playing on the swing set! We are anxiously awaiting the arrival of our nieces and my brother and SIL!!! They are moving back from NC and we haven't seen them in months. My kids have been asking all day "are they here yet?" "are they here yet?", they are super excited!!

So here is a birthday card that I made for the FCCB to help celebrate their first birthday! I recently came across this blog and have loved all of the inspiration and the challenges!

I used the Birthday Bash papers from Imaginisce and the Birthday Bash cricut cartridge!
I made an easel card (which I just love making) and sized it to be a vertical 4x6 card. The directions to make an easel card can be found here. I added some diamond glaze to his nose, eyes, buttons and juggling balls!

Tuesday, March 22, 2011

Spring Is In The Air!

Good morning! It is definately a beautiful Spring day here today, the sun is shining bright! Here are two cards that I made yesterday using the Imagine and the Imagine More cartridge. I printed the Images the way that they were and I love how they coordinate so nicely! I am still learning about the Imagine and how to really pull everything together!

For this card, I cut the frame, kite corners and the little chick. The chick printed with a rooster, but I just wanted the little chick, so I cut the rooster out...lol! The words are computer generated and cut up and then I lightly inked the edges! I also used pop dots and popped up the photo corners and the chick!

ImagineMore Cartridge:
frame (pg. 23) 4.5 "
corners (pg. 23) 4"
rooster/duck icons (pg. 33) 3.2"
kite icon (pg. 33) 3.5"

For this card everything was printed and cut using the Imagine and Imagine More cartridge. I used some pop dots and tulle and the card was done in about 5 minutes!

Imagine More Cartridge:
card base {bonus (pg. 29)} 8.8"
music sheet (pg. 18) 6" {I deleted the rest of the extra images on that cut}
music notes (pg. 9) 5.1"
piano (pg. 9) 5"
phrase (pg. 9) 5.1"

Thanks for stopping by I hope you have a beautiful Spring day!!

Wednesday, March 16, 2011

Happy St. Patrick's Day!

Good afternoon and Happy St. Patrick's day!
My son volunteered me to help at school with some sewing projects that theyare doing, so I was at school all morning. I was helping the 3rd and 4th graders sew some clothe napkins so they can use them in their lunch boxes and GO GREEN!! I am sad to say that I am not making corned beef and cabbage tonight...not enough time and my DH has to work. I called Mom in hopes that she was making some, but no luck there. Maybe this weekend!

So, here are some tube scarves that I made with the inspiration from Kristen Swain using the knifty knitter circle looms. For these scarves, I used the flower loom and just kept knitting all around in a circle until it was the length that I wanted. I made the flowers using the flower loom as well and added a circle gem and some hair clips from Michaels.


For my scarf, I used a moss green chunky yarn in only a single strand and used a grey for the flower.

Sorry, I never got a pic of my DD's scarf, will have to update that later....ooops!

Here is a treat that I made for the kids! I wish I could claim it as my own, but I found this adorable idea from greenbean on the cricut messageboard and she had found the project here. I used the clouds that are built into the Imagine and cut four of them out and just taped one to one side of the bag and one to the other side just using some atg tape. I cut the pot from Simply Charmed cartridge at 2" and used glue dots to adhere the gold coins! The kids just loved these this morning, what a great idea, so thank you girls!

Here is a cute little card that I made for the Fatnabulous Cricut challenge blog! We had to use green and gold or bright yellow in my case and it had to be square! I used the Spring Holiday Cards cartridge for this and it was done. I added some google eyes and some black dots using a glaze pen just for some added detail!
I hope you all have a wonderful day today and don't forget to wear your green or you just might get pinched!!!

Imaginisce Honey Card!

I was so inspired by the DT's projects over on the Imaginisce blog when they were showcasing the Berryliscious collection....drool! So, I ordered the Berryliscious collection along with some animal crackers papers, too cute. I couldn't wait to work on some projects using these awesome papers and embellishments!

This card that I created for my husband is for the Imaginisce sketch challenge this month. I kept it very simple and he appreciated it so much! I hand wrote the 'for my honey' and the extra doodles on the bee hive!

For the challenge, we had to incorporate 3 pattern papers (check), 3 colors (check) and 3 embellishments (check).

Supplies: Imaginisce berrylicious sunshine seeds and sweet summer garden paper, green cardstock insert in package (green polka dot paper), brown shoelace, pop dots, atg tape and brown ink.


Sunday, March 13, 2011

Shaped Cards....Boy Style!!!

I just got the Boys Will Be Boys cricut cartridge in the mail last week and I immediately ripped it open! Now, with my son being 9 and growing up so fast, I wasn't so sure that I wanted this cartridge, but seeing the images made me think otherwise!! When I saw the fire truck image I knew I wanted to make it into a shaped card so I immediately started welding and sizing the fire truck using my Gypsy! I made it quite large ( about 7x4.5 inches)....it came out so cute and my son just loved it!!!
But.......it didn't stop there!!!! I kept on welding and sizing and cutting!

I made the police car..............
and the tractor..............
and the monster truck...........I just had so much fun with these shaped cards!!! Not only are these perfect for my son and my daughters friends (birthday parties seem like every other week around here....lol) , but they are great career cards for adults, too!!!


I hope you have enjoyed this mini series of truck shaped cards as much as I have enjoyed creating them!! Stay tuned for some sports shaped cards to come in the near future...lol!!

Enjoy your day!!!!

Friday, March 11, 2011

Altered Paint Can....CRICUT style!!

Hello friends!
Here is a project that I have been working on for well, honestly, over a week!!! LOL!
I altered a clear paint can to hold my calling cards from cricut meet ups! I used the new Everyday Cricut Cartridge to decorate it!

I had so much fun creating this. There are some cute images on the Everyday Cricut cartridge! I used Echo Park paper, the i rock for some bling on all my little cricut critters and I used shrinky dinks in the Imagine to add a little charm!
Here is the front of the can....see the bling on the bug heads!

For the top of the can I used a fiskars treading water punch and made two fan fold flowers using the Martha Stewart score board and adhered a bug head in the center!

This is the side of the can....on the handle I used some white and pink tulle and some ribbon. The cricut circle charm is a shrinky dink that I made in the Imagine....when it printed it was a lime green and then as it shrunk it turned darker. I used bakers twine to attatch the charm.
This is the other side of the can....the circle washer is to take the lid off!
Here is The back of the can. I used the Gypsy symbol, some cartridges and the cricut cake symbol....my favorite things to use!

Here are all of the cut sizes:
Cricut Circle charm: colored and cut using Imagine (blade 5, pressure 5 cut 2x) 7.5 inches
Gone Buggy phrase: 4 inches using the shadow feature in brown....I cut one out in pink and again in green and then cut the green circle out and placed on top of the pink.
Bug Heads: 2", 3", 3.5" and 4"
Cricut Cake Symbol: 2.5 "
Mini Cartridges: 1.25", 1.5" and 2"
Cricut Cartridge Case: 2.5 "
Expression: 2.5"
Gypsy Symbol: 2.5"
So there you have it....an altered paint can....gone CRICUT CRAZY!!!!!! I can't wait to put my calling cards in there from the last meet up that I went to!!
P.S. Yay....I just hit 100 followers, so thank you all for all of your support, I am very grateful for all of your sweet comments!!!


Thursday, March 10, 2011

Baby Onesies!

Good morning!
Well, my new sink is finally in and I just love it!! Now, if I accidentally broke the refridgerator...that would need to be replaced right????? LOL!!!

So, I have been busy with so many things going on and so many projects. Here is a little gift that I made for my DH's friends who just had a baby boy! I made these two little onesies using my cricut!
The first one:


For this onesie, I used my cricut Expression and cut the sail boat using the New Arrival cartridge and used the freezer paper method. I cut the image with freezer paper....I didn't have to flip the image because it was a basic image.....then I ironed it onto the onesie and used it as a template. I used fabric paint in two colors, blue and green. Simple and adorable!!

Onesie #2:

For this onesie, I used my Imagine with the Mickey Font and some iron on transfer paper! I had to flip the image so that the letters will print the right way. I used the Hopscotch Imagine cartridge for the patterns in the letters. The letters are sized at 1.8 inches! I just love the I with the clouds! Using the Imagine was super simple and the transfer paper was printed and cut perfectly. This came out so nice and it was so easy using the Imagine!!

I will definately have fun making more of these baby onesies!

Hope you all have a great day, I am off to shop for some birthday gifts for my Triplet nieces and nephew who are turning 11 in a couple days....I can totally remember when they were born weighing less than 2 pounds each....they are truly amazing!

Tuesday, March 8, 2011

Kids in the Spotlight!

Good afternoon! It has been a hectic couple days here as we have been running all over trying to find a new kitchen sink and faucet and trying to get it installed...nothing is ever easy...lol!!!

So, my kids created these little pieces of artwork this weekend and asked me to put them in the spotlight on my blog! They are so proud of themselves and the work that I do and they feel special (as they should) when they actually get posted on "Mommy's Blog!"
I had a girl and a boy gnome left over from my last project and they asked if they could have them....of course I had to say yes!!

Here is what my daughter Samantha created.....she loved using the stickles to 'glitz' it up (her words) and I just love the way that she punched holes and did paper lacing with baker's twine!
And here is what my son Christopher created....he was feeling a bit more rushed than Samantha and he doesn't usually work in colors.....he is more of a sketch artist!!
Thanks so much for looking and any and all comments would be much appreciated by myself and my little scrapbook artists, thank you!!!!
Hopefully I will be back later with another project that I have been working on....if I can get my camera to take a decent picture!

Friday, March 4, 2011

Birthday Bash!!

Goodmorning friends!! Just poppin' in to share these 2 cute cards that I made yesterday while I was fighting an upset stomache....seems to be the only thing that really helped...lol!!!

I used the B-Day Bash papers from Imaginisce and the cricut Birthday Bash cartridge!!

I think these papers are so much fun and I just love the Birthday Bash cartridge, I think the images are great!!!

I hope you all have a Fabulous Friday!!! My hubby and I are going to do some shopping around....we need a new faucet for our sink...since he broke our kitchen sprayer by tying a rubber band around it so that I would get soaked when I turned the water on.....funny?? NOT!!! So, now it is payback and he has to go shopping with me for a new one...anyone that I want...lol!!! We are also going to go to TGIFridays for some lunch!!! Enjoy your day!!

Wednesday, March 2, 2011

Gnomeo & Juliet

Hi there! It has already been a busy week so I took a little break today to create this layout! I took my DD to see the movie 'Gnomeo & Juliet' last weekend and I must say it was adorable...Sammi was so excited to see it, just us girls!

So when this weeks challenge came out using fairytales and folklore on the cricut circle blog, I was so excited!! I actually (shhhhh, don't tell) bought this cartridge for the gnomes just to make this layout!!! Really, I did! I passed this cartridge up at the M's $10 deal and then had to pay more just to get it! Well, what can you do. I think that this layout justifies my parchase...don't you???
Here are some close ups: sorry for the glare...the frame around the picture is an acetate overlay!


The background cloud paper is from the Imagine Hopscotch cartridge...I love it! I used my E for most of the cuts, but also brought in the Gypsy to weld the grass together from Sports Mania and also for the frog and the castle (because I was too lazy to go get the cartridge OUAP). The rainbow, sun and flowers are diecuts from the Me and My Big Ideas childrens activivty pad ( so cute with lots of activities for kids and some great pp and die cuts). The flower frame is from Deja Views: transparent frame, garden. Oh and I used plenty of pop dots, too!!
Freshly picked: gnomes 3 1/2", mushrooms 1 1/2" 2" and 2 1/2" , sign post sized using Gypsy, garden
Alpalicious: letters red using Gypsy
Sports Mania: grass welded on Gypsy
Once Upon A Princess (ouap): castle top cut with Gypsy and using the hide contour feature, frog
I sketched it out and knew which materials I would use and then just started cutting and pasting and it finally just all came together!
Have a great rest of the week!