Friday, January 31, 2014

Thankful Garden

Hi there! TGIF...that's all I have to say! I am looking forward to what will hopefully be a relaxing weekend! How about you?

I am still doing my "homework" for the Stenciled class and having fun while I'm at it!  I have loved using the few stencils that I have to create different cards for different occasions!  
Here, I created a thank you card using a MFT Wildflower stencil and distress inks! I had so much fun masking off areas of the stencil to keep it clean and to get it to look like a garden! I added some tiny sequins in some of the flowers to bling it up a little and stamped the sentiment in distress ink and clear embossed it!


  Supplies:
SSS green apple card stock 
Neenah solar white card stock 
Tim Holtz Distress Ink; peeled paint, wild honey, worn lipstick and broken china
Ink blending tools
MFT Wildflower stencil
Avery Elle Handwritten Notes stamp set
Tiny sequins: SSS December card kit
Foam adhesive, versamark ik, clear embossing powder 

Thursday, January 30, 2014

XOXO

Hi there! I'm back again with another card that I made today!  I have been so inspired to create lately...especially by having signed up for the Stenciled on line card class! 


For this card I started with a teal cardstock from Bazzill and silver embossed it using the "Mosaic heart" stencil by SSS.  I cut the XOXO from the cricut E2 using the pre installed cartridge...I forgot the name sorry...I was just happy to find it. So I cut the XOXO at 1" (it had scrolls on both sides, but I just snipped them off) and I adhered two together to give it dimension! This card was inspired by a card that Shari Caroll did for SSS!  I used the Avery Elle "Handwritten Notes" stamp for the sentiment and white embossed it on a vellum banner. I added glue behind the letters to adhere. I also used Mama Elephant for SSS "Filled With Love" stamp and die for the little tag with sentiment and tied a bow with bakers twine. I added some red punched hearts and added wink of stella glitter pen to them. I like the pop of red with the teal and silver! Oh...I rounded the two sides and used foam tape to adhere to base! 
I think that about does it for this card! I love how it turned out!  I think I have plenty of Valentines cards now but I just love creating them! 
Thanks for stopping by tonight!
I am entering this card in the Simon Says Stamp Wednesday Anything Goes With Twine or String Challenge: featuring Mama Elephant!

Thanks A Ton

Good morning! 
My daughter needed some thank you notes for some friends at school so I made some cute mini notes!  These are 2 1/4 X 3 1/4".  I used a Fiskars punch on the bottom, some washi tape, a Scrappy Moms "Amusing Animals" stamp for the sentiment and  Lawn Fawn "Love You Tons" stamp and die! Oh, I also used a mini heart punch just for fun!
These are super quick and simple...but we're fun to make!


Thanks for stopping by!

Wednesday, January 29, 2014

My Lil Hoot

Hi again! Here is a another little card using embossing paste, a stencil and the OWH Lil Hoot stamp set!
I made it small...about 41/4 x 31/4 for a lunch box note!  


I started by light inking the edges of a sea glass SSS cardstock and then used the SSS falling stars stencil. I used white embossing paste and added a small chunk of yellow Gelato and mixed until it was blended!  I colored the owl stamp using Spectrum Noir markers (see previous post for colors used). I had stamped and colored this owl as a test run so I figured I would use it! I stamped and added more leaves under the little owl just to balance out the small card!  I cut the banner shape using the Cricut and Girls makeup Party cartridge at 1 inch. I inked the banner using Hero Arts butter bar ink.  I masked off the (to) part of the sentiment and shaped it a little to fit in the banner and stamped in black ink! I used foam adhesive to adhere the owl and the banner to the card front. I cut a white card and used a fiskars threading water to  punch a border! 
This mini note card is so cute considering I was just playing around with colors and embossing paste! 
Thanks for stopping by and have a great night!

Shining Star

Hi and good afternoon!  We had another few inches of snow here and the kids had a delayed opening...I love these mornings! 
I whipped up this card...ok well I didn't whip it up...it took days! Lol! I did a little here and there but putting the card together after all of the elements were done was super fast! 


started with a 4x5 1/4 sea glass (SSS) cardstock and blended some broken china distress ink around the edges. I used the SSS falling stars stencil and white embossing paste then sprinkled it with silver embossing powder, let it dry and then heat embossed! I love the look of the silver stars! I have to say that I "borrowed" this idea for the card from Debby Hughes (from the Stenciled Card Class)...I just loved it! 
I used the OWH Lil Hoot owl stamp and colored it with Spectrum Noir markers (GB5, DG2, DG3, IG1, GB8, GB10, BG4, BG6, BG8) and cut it out. I stamped the branch again, colored, cut and used foam tape and adhered to the branch and cut the leaves and adhered them! Just gave it a fuller look. I used Zig wink of Stella on the leaves and the owls tummy and ears...just to add shine. I used CTMH liquid glass for the eyes. 
The banner was cut on the Cricut using Girls Makeup Party cartridge cut with its shadow at 1.5 inches! I didn't have a banner die and my silhouette hasn't been working so I was happy to pull out my cricut and cut what I needed! 
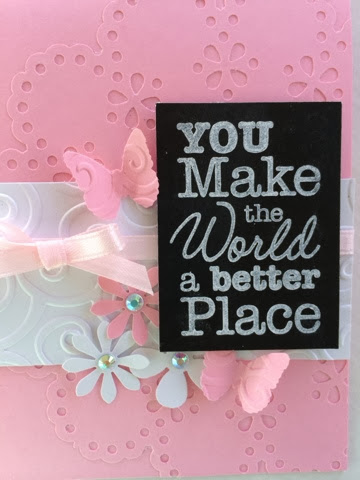
The sentiment for the banner is from Cardztv "It's All About You" stamp set...I masked it off so it would fit long ways on the banner! 
I cut two mini tags using "Filled With love"  By Mama Elephant for SSS die and stamp set and adhered one behind the other and hung from the banner using May Arts Natural Twine. 
This has to be one of my favorite cards and I have to say that the Stenciled class was great with lots of tips, ideas and inspiration! 
I am entering this card at the Simon Says Stamp Wednesday challenge where it I say thing goes with twine and featuring mama Elephant!
Thanks for stopping by and stay warm!

Sunday, January 26, 2014

You Make me Proud!

Hi there! I'm back again with another card! 
I saw that Tim Holtz released a spritzer and I immediately thought to myself...gee, I bought one of those years and years ago!  I knew exactly where it was and began creating backgrounds with it!  I don't own distress markers yet but I used it with a sharpie marker and it worked great! 
 Here you can see that it stained the stencil but I am fine with that!  I created the background just experimenting with different angles and going close to the stencil...what I got was the look of denim and I was so pleased! I love the idea if the spritzer! 
For my card, I also played with white embossing paste and another stencil "falling stars" from SSS...I masked off an area where I wanted the background to go and stenciled the hearts! So fun and what a great texture to add to any project!  I used the OWH lil hoot stamp set and colored in the bears using my Spectrum noir markers and added an action wobble! 

 I embossed the sentiment on Neenah desert storm cardstock and notched it to a banner! I also inked the edges lightly!
I think this card is adorable and will give it to my son when he finishes his midterms!! 
I am entering this card in the SSS Monday "A" challenge this week!  My "A" is for airbrush and animal! Thanks for stopping by! 

Do Amazing Things...

Good morning! I am back with another card that I made last night and finished up this morning for the Stenciled class!  
Here I used a stencil and mists to create a beautiful two tone background!  I love the pop of the peach colored paper with the green and gold background!  I die cut a label and used a SSS "You" stamp set and die! To make the "you" I die cut it three times and adhered them together to add dimension!  I used white embossing powder for the sentiment and added some gems to balance it out!


Supplies:
Basic grey paper (in the SSS February kit)
Hero Arts gems
Heidi Swapp color shine (mint green & gold)
SSS "You" stamp set & die
MFT Moroccan Tiles stencil
Versamark ink, white embossing powder
Spellbinders labels 6 die

Saturday, January 25, 2014

Happy Heart

Another quick post tonight before bed!  I don't usually craft at night but I wanted to try a technique that I learned from the Stenciled card class that I'm taking. 
I made my own stencil by gluing two pieces of 4x6 card stock together using the large side of the tombo glue (let dry) and a beater....then randomly placed the heart die on the paper and used my cuttlebug to cut out a bunch of hearts to create a stencil! So much fun! 

I cut a strip of cardstock about 3 x 5.5 and started coloring in the hearts without outlining them and it just gave it a sketched look...the stencil worked perfectly! I used Crayola color pencils from my sons stash...they weren't just the basic colors. They worked fine for this I thought. 

I covered the card base with the black polka dot paper and adhered little strips of scrap paper notched to a banner along the left side just randomly. I tied bakers twine around white card strip and stamped the sentiment. The heart panel is adhered with foam dots!  
I am pleased with how the card turned out and had great fun making my own stencil!
Ok that's all for tonight...time for bed!!
I'll be back tomorrow with a few more card posts!

Supplies:
MFT "You Make My Day " stamp set
Colorbok "Hopscotch" papers
Crayola colored pencils
Red bakers twine
Foam adhesive
Memento tuxedo black ink
Neenah solar white card stock
SSS heart die
Tombo mono adhesive

Makes Me Happy

Hi there!  We had a cold icky day with wind and snow, which was perfect weather to stay in and create! Being that it is Saturday and having to clean up, do laundry and cook....it has taken all day to make this card! Lol, but so worth it!
Today is day two of the stenciled card class that I signed up for and I am having so much fun creating ( when time allows)!  
For today's card, I created my own mask and stencil using the post it tape and a post it note....using a Martha Stewart butterfly punch!  Oh my gosh this was so fun!  I punched 4 butterflies out of the tape and then stuck it to a piece of patterned paper (Crate Paper) and used some worn lipstick distress ink with a blending foam. I created 3 rows of butterflies! Then I created the mask with a post it note and was able to add text to a few of the butterflies...so fun! 


I gold embossed on vellum and attatched it to an overlay square with skinny strips of foam tape and mini glue dots and added a mini clothes pin...the inspiration from those details was Julie Ebersole! Thanks Julie! 
Well, it may have taken a long time to get the card put together, but it was fun to do different techniques! Thanks for stopping by!

Supplies:
Crate Paper 
Neenah desert storm card stock
Flea market (crate paper) overlays
Mini clothes pins: Canvas corp
Text stamp: vintage background
My favorite Things: You Make my Day stamp set
Martha Stewart butterfly punch
Post it tape
Gold embossing powder
Vellum

Friday, January 24, 2014

Thinking of you...

Hi again! I figured I would share another simple card that I made! 


I used a MFT stencil "Moroccan Tiles" and blended some spun sugar and worn lipstick TH distress ink for the background. I cut a banner shape out of vellum and used a stamp set from the SSS February card kit (which came today!) the stamp set is called Thinking of You and the sentiment comes in a long strip so I masked off the 'of you' and stamped the 'thinking' with versamark and then did the same for the rest of the sentiment. I added some blushing pink pastel using Stamp-N-Stuff embossing powder ( don't really like it) but I thought it would look pretty on the vellum tag!  
I used the new Hero Arts Butterfly and flower stamp set and die. I cut the butterfly out of vellum and then stamped the detail with versamark and added the same pink powder. I added some recollections enamel dots to the butterfly. I mounted the background on a navy blue base and then adhered that to a white card base!
This card came together quick and I love the navy, pink and vellum together! 
So, that's all for me tonight..I have to pick my son up from an event at 9 and then it's time to unwind! 
Thanks for visiting and have a great Friday night!

Birthday wishes

Hi! I signed up for a class on line...Stenciled at onlineclasses and I learned fun new techniques using my stencils and different mediums!
Today I created this birthday card!  


started with a stencil from MFT "stencil on the diagonal" and I taped it on a diagonal and used 5 different distress inks...spun sugar, worn lipstick, fired brick, peacock feathers and broken china. I started light on the bottom and got darker up top. I trimmed that down and added thin strips of a teal cardstock.  I used a Christmas stamp set from SSS called "Big Holiday Wishes" and I masked off the "holiday" in the stamp and stamped it on the card...then I used Basic Grey letter stickers to spell out "birthday" using a T square ruler for perfect alignment!   I added a punched heart with glossy accents and some sequins for fun! 
I will be back later or tomorrow with a few more cards! Thanks for stopping by!

Monday, January 20, 2014

Embossing with Gelatos....

Good morning!  Today I have a card to share that I had fun creating with some Gellatos...actually, my 10 year old daughter made the background and I had to use it on a card....first we used an old stamp and white embossed it and then added some gellato colors and she smeared them around with her finger.  Then I punched a strip and used a MS punch for a border and stamped a sentiment from "Filled With Love" from Mama Elephant for Simon Says Stamp and embossed it in gold.  I also stamped and die cut a bunch of hearts from the SSS "Plenty of Hearts" and gold embossed them too!


 The paper seems to be showing up as a light purple, but it is a light pink...I wish now that I had used a white strip of paper instead, I think it would have made the background and gold embossed hearts stand out more.  I added some red and gold sequins for fun.
I am submitting this card into the SSS Wednesday Emboss It challenge!! 
Thanks for stopping by and have a great day!

P.S. I am signed up for a class at onlinecardclasses.com called Stenciled...all about using stencils on cards and I am so excited to learn.  I have purchased a bunch of fun supplies and can't wait to use embossing paste and gellatos with the stencils and just get messy!!!  I know my kids will enjoy it as much as I will!

Saturday, January 18, 2014

Chase Your Dreams

Hi there!  I had a wonderful time making this card...it took me all day with bits and pieces, but it all came together beautifully!
First off, I used a sketch from MFT - Get Sketchy challenge... At first when I saw this sketch, I didn't know where to go with it and I always like to incorporate MFT stamps into it (which I only have a few).  I finally grabbed my January SSS kit and got to playing!


I started by grabbing MFT wildflower stencil and chalk ink and started building onto the grey wood grain paper in the kit...Fancy Pants "Beloved" collection! I also used the triangle paper in the kit and cut a strip and then cut the triangles to form a sort of banner. I added a thin strip of grey and white stripe washi (from SSS Dec kit) and machine stitched it in.  I stamped the great quote on vellum and used some light pink embossing powder and then stitched that on.  I cut apart one of the Fancy Pants "Beloved" tickets (also in the kit) and used the washi to attach it to the top of the card and added a twine bow. I cut the end piece in half and stitched that onto the side of the card!  Then I used foam tape and adhered the tag to the base. The base is a standard card using the wood grain white paper in the kit! 
I think that about sums it up! I love the direction that this card went and am off to upload it into this months sketch challenge at MFT!
I really do appreciate all comments and feedback...thanks for stopping by!!

****edited to add that I entered this card in the SSS Monday Anything Goes Challenge*****

Friday, January 17, 2014

How Sweet it is...

Good morning!
I have had my daughter home all week with the flu and fever...she has been lethargic most of the time and in between running her water I had time to make some die cuts and whip up a simple card! 
I found a 'new to me' site called Sketch n Scrap and used this months Card Sketch #17....I flipped the sketch on its side and this is what I made:


And here is the Card Sketch #17....

I used Neenah desert storm for the card base and the stitched border stamp from SSS January stamp set in some white chalk ink. I cut strips of paper from Colorbok Hopscotch paper pad (so fun). I clear embossed the XO using SSS Big Holiday Wishes set on the teal paper because I felt it needed a "pattern" and quite honestly I just love to emboss!!! 
I used a Mama Elephant for SSS "Filled With Love" stamp and matching dies to create the jar with candy. I colored the lid and the outer jar with grey Spectrum Noir markers, tied with twine and added the tag that I stamped and die cut! Super seet. I used some different inks that I had on hand and stamped and die cut the candies. The strip sentiment is also in the stamp set and although it doesn't have a matching die, I just cut around it and used foam tape to adhere to the front of the jar! 
I loved using the sketch and love how fun this card was to create! Thanks for stopping by!

Sunday, January 12, 2014

You Make The World A Better Place...

Hello!
It is a beautiful, rather warm, Sunday here! How is the weather by you? 
I have been loving to see all of the peaks posted from CHA and am excited to see all of the new beautiful and fun products!
Today I have a card that I made for my daughter for the MFT color palette challenge! The colors to use are none other than MFT's colors..pink, black & white! A favorite color palette of mine so this was easy!


Supplies:
My Favorite Things DC Vertical Greetings stamp set
Pink, white and black chalkboard cardstock
Martha Stewart circle doilie and butterfly punch
Two flower punches
Hero hues gems
Pink ribbon
Swirls cuttlebug embossing folder
Powder puff chalk ink

I love how the pink doilie just adds a bit of femininity to the card without standing out too much on the pink card base! I love the chalk look of the beautiful sentiment from MFT! I guess I should just say that I love how quick and easy this card was and am pleased with the outcome! Thanks for stopping by today!

Saturday, January 11, 2014

Sparkle & Shine

Good morning...well it's a little after noon!!!  I have been quite crafty lately in the midst of a chaotic new year!
Today's card was made with a few fun techniques and I love the way it all came together! It was created for the MFT sketch challenge! MFT is My Favorite Things found at mftstamps.com and it is a site that is new to me! I recently placed my first order and was pleased with the prices, the shipping, the packaging and the product! I will be ordering from they again soon! 
So here is my card:


For the pattern strips I used a Hero Arts tiny flag stamp and a technique that I learned form Nichol Magouirk's blog! I used Neenah solar white paper and clear embossed the image and then went in and masked off each diagonal row of flags and used distress inks...spun sugar, worn lipstick and fired brick! I had so much creating! 
Now for the heart....I used the MFT Die-namics Layered Heart die (the one with the pierced holes. It cut very nice and crisp! I then stamped the sentiment using MFT SDD- Celebrate life stamps...I just live the sentiments and the doodle look and was so fun to color. I used Spectrum noir markers BT5 and DR3 then added wink of Stella to the colored areas for some sparkle and shimmer! I used 4 stands of DMC red floss and the backhand stitch to stitch around the heart! I love how it turned out and was fun to make! I added some buttons (MFT blue raspberry) with wink of stella and some red sequins for sparkle! 
And there you have a fun sparkle & shine card...this can be used for Valentine's day or any other day when you want to tell someone you love them! 
Thanks for stopping by and have a great day!

Friday, January 10, 2014

With Sympathy

Good afternoon!  
I needed to make two sympathy cards today...never fun to do! I wanted to keep them CAS and I wanted a monochromatic look. So, I grabbed my two new colors of SSS papers, Green Apple & Sea Glass.  I clear embossed the background using a Hero Arts cling stamp (CG315). I then used a rubber stamp (which is mounted crooked on the base...this is why I like clear stamps) and added it to the front of the cards...one embossed on vellum and the other on the blue cardstock. I added some butterflies punched from a MS punch. 


I love the background stamp and how the clear embossing really brought the color out!
I think they turned out very nice and appropriate for a sympathy card! What do you think?
Thanks for visiting!
** edited to add that I am entering the blue card in the SimonSaysStamp Monday challenge...use blue!)****


Thursday, January 9, 2014

Some Odd Girl Birthday!


Good morning!
I have another birthday card to share today. I made this for my niece who just turned 5...my nieces are some of my biggest fans and I love it! 
I used the same Some Odd Girl Tiny Baker Tia stamp...they are just so much fun to color!  This time around I used my Spectrum Noir markers to color her...I am new to coloring stamped images so I thought the markers would be a good starting point, but they don't blend very well and I'm not very happy with them!  I may invest in some copics sometime this year! 
Anyway...here's the card


I used a sketch from Mojo Monday so I will enter this card there!
I am also entering it in this weeks Lawnscaping "Let's Party" challenge!

I added some wink of Stella to her boots, apron and hair and then liquid glass to her eyes and the heart on her hat...that I drew in! 
Card base 5x7
Polka dot paper by SNAP
Polka dot embossing folder
SSS Lots of Hearts stamp
CTMH liquid glass
Spellbinders die
Spectrum Noir markers
Worn lipstick distress ink, pop dots, bakers twine and assorted sequins.